Gibson Mill was build around 1880 and was originally know as Lord Holme Mill. It was used as a water powered cotton Mill until around 1890. During the early 20th century it was converted into an enetertainment centre featuring: dancing, roller skating, refreshments and boating(!) on the former mill pond. The buildings became disused after the outbreak of the second world war and remained empty until they where restored as a visitors centre in 2005.
The panorama is taken from the bridge spanning Hebden water and Shows the large mill building surrounded by workers cottages. The small building just visible on the other side of the river where part of the later entertainment complex.
For more information on visiting Hardcastle Crags and Gibson Mill is available at the National Trust page here.
Friday, December 30, 2011
Saturday, November 19, 2011
Hampton Court stairs
Stairwell in the Baroque section of Hampton court palace.
Saturday, November 12, 2011
Occupy LSX Saint Pauls
Composite photograph of the London Occupy protest taken on the steps of Saint Pauls early November 2011.
Thursday, November 10, 2011
Fosterclough
New version of a composite photograph taken in spring at Fosterclough looking down over Mytholmroyd.
Wednesday, November 2, 2011
Tuesday, October 25, 2011
Photosynth panorama of Gümüşlük, Turkey
Gümüşlük is situated on the remains of the ancient city of Myndos, The remains of the old city are partly under the shallow water in the center of the photo.
Monday, October 24, 2011
Monday, October 17, 2011
Sunday, August 21, 2011
Leeds: The Headrow, Town hall and library
Full 360 panorama showing the town hall, library and galleries. Taken from the corner of the Headrow and Calverley Street.
Friday, August 19, 2011
New facebook page for panoramic photos
Some of the best ones from the past couple of years or so are now on here:
http://www.facebook.com/pages/Photosynth-and-Photography-Phil-Openshaw/222427561135082
for people who like facebook...
http://www.facebook.com/pages/Photosynth-and-Photography-Phil-Openshaw/222427561135082
for people who like facebook...
Thursday, August 11, 2011
Making panoramic images with Hugin Part 1
Introduction Hugin is a photo stitching application (actually a tool chain of applications) that can be used to join photos into composite image, correct image and perspective distortion and create full and partial panoramas.
Unlike many comparable programs Hugin is fully GPL and can be used in conjunction with several other stitching applications and other helper software .
Stitching images together
The simplest way to begin using this program is to click on the Assistant tab (the first on on the left) this will allow you to run the program automated for simple jobs.
1. Click load images, this will bring up a standard dialogue box allowing you to select the images you want. It may be better to try this with a simple panorama using a few photographs at first.
2. Hugin will analyse the photographs for data on the focal length and visible angle of the shots. If you are loading images taken with a mobile phone this may not be encoded in the image. Hugin will prompt you to enter this data if it not available. For now just enter a figure 40 mm if you don't know
3. Click the 'Align'button. The program will begin to analyse the photographs for common points on the images you are stitching. This can be quite a long process as Hugin will first try to match the images in sequential pairs and then find common points with groups of images.
4. Preview the image. A separate window will now open showing a rough preview of the stitched images. This window will also allow you to select differing projections of the completed project. For now leave it as it is.
5. Click generate panorama. This will now bring up another box showing the progress of the stitching process. When this has finished your Completed image will be in the same directory as the source photographs.
Saturday, August 6, 2011
How to create tiny planets from panoramic photos and Photoshop
These images can look great and are very easy to produce from existing panoramas.
what works: A full 360° x 180° panorama works best but any wide panorama image can be used as long as there is a large unbroken area of sky. An image where the horizon is the same height at both ends will produce ‘rounder’ planets. Images that are not fully 180° vertically may produce a squashed effect in the centre of the image but this might look just as good, as this is easy to do it’s best to experiment with any suitable photos you may have.
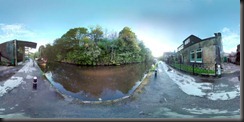
The image above is a full panoramic image stitched using Microsoft ICE. An image stitched using the panorama feature of a camera/phone or produced using any similar program such as Hugin will do just as well.
Step1. Change the proportions of the image so that it is the same dimensions in height and width. Click ‘image’ then ‘image size’. When the resize image image box appears untick the ‘constrain proportions’ box. Change the horizontal dimensions to the same as the vertical ones. If the image is very large it might be an idea to resize both dimensions to the size you wish the completed image to be. the image will now look like this:
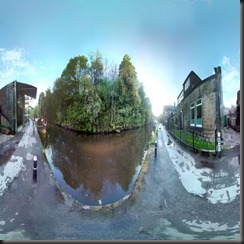
Step2. The image needs to be rotated so the the ‘sky’ is at the bottom of the image. Go to ‘image’ then ‘rotate canvas’ and select 180°.
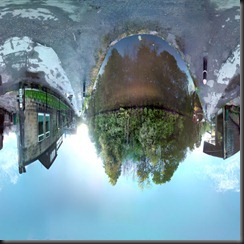
Step 3. Now to create the planet effect select ‘filter’ then ‘distort’ and choose ‘polar coordinates’ make sure ‘rectangular to polar’ is ticked. That it! your image will now look like a small planet.

what works: A full 360° x 180° panorama works best but any wide panorama image can be used as long as there is a large unbroken area of sky. An image where the horizon is the same height at both ends will produce ‘rounder’ planets. Images that are not fully 180° vertically may produce a squashed effect in the centre of the image but this might look just as good, as this is easy to do it’s best to experiment with any suitable photos you may have.

The image above is a full panoramic image stitched using Microsoft ICE. An image stitched using the panorama feature of a camera/phone or produced using any similar program such as Hugin will do just as well.
Step1. Change the proportions of the image so that it is the same dimensions in height and width. Click ‘image’ then ‘image size’. When the resize image image box appears untick the ‘constrain proportions’ box. Change the horizontal dimensions to the same as the vertical ones. If the image is very large it might be an idea to resize both dimensions to the size you wish the completed image to be. the image will now look like this:

Step2. The image needs to be rotated so the the ‘sky’ is at the bottom of the image. Go to ‘image’ then ‘rotate canvas’ and select 180°.

Step 3. Now to create the planet effect select ‘filter’ then ‘distort’ and choose ‘polar coordinates’ make sure ‘rectangular to polar’ is ticked. That it! your image will now look like a small planet.

Thursday, August 4, 2011
Sunday, July 31, 2011
Staups Mill, Jumble Hole Clough: Charlestown
Jumble Hole clough is a narrow steep sided valley with a small stream running into the river Calder. In the 18th and earth 19th century the valley was an industrial centre with containing a number of mills and housing.
The large wall visible in the panorama is the remains of Staups mill. This was a water powered cotton mill fed from a dam higher upstream.
More information about Jumble Hole Clough and the remains of industry in this area can be found here
The large wall visible in the panorama is the remains of Staups mill. This was a water powered cotton mill fed from a dam higher upstream.
More information about Jumble Hole Clough and the remains of industry in this area can be found here
Friday, July 29, 2011
Wednesday, July 27, 2011
Colden Clough, Hebden Bridge: Aliens and robots
a sculpture trail in Colden Clough created by the children of Hebden Royd C.E Primary School. There till September. Details at http://www.hebdenbridge.co.uk/news/2011/122.html for anybody who is interested.
Tuesday, July 26, 2011
Tips on capturing a 360° panorama using Photosynth and Microsoft ICE
Capturing a panorama:
If you are not using a tripod: Pick a spot and rotate ‘round’ the camera as if it (not you) is fixed to a point on the ground. I have found that taking photos in vertical sequence, working from top to bottom to top seems to work best. Go for an overlap of around 75°. When you have taken the first vertical sequence return to the bottom (as near to your feet as possible) and moving about 25% of an image to the left/right for the next vertical ‘strip’. When this has been repeated for the entire scene, step back and capture the area which was underneath the camera by moving around the area taking several photos.
If you are using a tripod the same procedure will work although you may have to remove the camera from the tripod to photograph the last few ground images.
Optimal number of Photos:
For a 360° x 180° panorama anything around 300 seems to work best, anything over this requires a lot of processing time and physical memory on your PC.
Tips for capturing an outdoor panorama successfully:
It is possible to export you panorama as an image and then process/tidy up in Photoshop. To do this you will need the Photoshop export plugin from Microsoft research (available here). When you have copied this into your import/export plugins folder is will allow you to export your image directly to the Photosynth site. Please note that you should crop and resize your image from within ICE ans doing this in Photoshop will produce very strange results or refuse to work.
If you are not using a tripod: Pick a spot and rotate ‘round’ the camera as if it (not you) is fixed to a point on the ground. I have found that taking photos in vertical sequence, working from top to bottom to top seems to work best. Go for an overlap of around 75°. When you have taken the first vertical sequence return to the bottom (as near to your feet as possible) and moving about 25% of an image to the left/right for the next vertical ‘strip’. When this has been repeated for the entire scene, step back and capture the area which was underneath the camera by moving around the area taking several photos.
If you are using a tripod the same procedure will work although you may have to remove the camera from the tripod to photograph the last few ground images.
Optimal number of Photos:
For a 360° x 180° panorama anything around 300 seems to work best, anything over this requires a lot of processing time and physical memory on your PC.
Tips for capturing an outdoor panorama successfully:
- Keep the camera relatively level, some users have reported that a small spirit level fixed to the base of the camera can produce better results with ICE and Photosynth.
- If you plan on having the sun in shot try to capture the area around it first, it moves!
- Dense occluded areas such as leaves and small branches can be problematic, try taking more photos for these areas.
- If the scene you are capturing has people in it make a note of areas where people are moving around. Go back at the end and re-photograph these areas later. Discard the shots containing partial images of moving people before processing
- Large plain angular surface do not work well, picking a time with carrying shade and more shadows can help
It is possible to export you panorama as an image and then process/tidy up in Photoshop. To do this you will need the Photoshop export plugin from Microsoft research (available here). When you have copied this into your import/export plugins folder is will allow you to export your image directly to the Photosynth site. Please note that you should crop and resize your image from within ICE ans doing this in Photoshop will produce very strange results or refuse to work.
Monday, July 18, 2011
Gloucester Cathedral: East window
Megapixel composite image of the large stained east glass window. The east window of Gloucester Cathedral dates from the 1350s, the quire of the church was extended outwards to accommodate it and was the largest window in the world at that time. More details on the figures can be found at: http://www2.glos.ac.uk/bgas/tbgas/v044/bg044293.pdf . The Gloucester cathedral website also has a detailed description of some of the main figures in the window.
Sunday, July 10, 2011
Wednesday, July 6, 2011
Monday, June 20, 2011
Monday, June 13, 2011
Thursday, June 9, 2011
Hebden Bridge from Crow nest woods
View of Hebden Bridge with Old Town and Midgley visible along the tops. Click for interactive highlights.
Friday, June 3, 2011
Czech
Czech, a set on Flickr.
Žižkov Television Tower
Wednesday, June 1, 2011
Monday, May 23, 2011
Sunday, May 22, 2011
Saturday, May 21, 2011
Hebden Bridge: Alternative Technology Centre
Photosynth: Hebden Bridge Alternative Technology Centre 09-04-211
Friday, May 20, 2011
Prague
Czech, a set on Flickr.
Subscribe to:
Comments (Atom)


