Some of the best ones from the past couple of years or so are now on here:
http://www.facebook.com/pages/Photosynth-and-Photography-Phil-Openshaw/222427561135082
for people who like facebook...
Showing posts with label photoshop. Show all posts
Showing posts with label photoshop. Show all posts
Friday, August 19, 2011


Saturday, August 6, 2011
How to create tiny planets from panoramic photos and Photoshop
These images can look great and are very easy to produce from existing panoramas.
what works: A full 360° x 180° panorama works best but any wide panorama image can be used as long as there is a large unbroken area of sky. An image where the horizon is the same height at both ends will produce ‘rounder’ planets. Images that are not fully 180° vertically may produce a squashed effect in the centre of the image but this might look just as good, as this is easy to do it’s best to experiment with any suitable photos you may have.
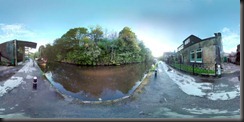
The image above is a full panoramic image stitched using Microsoft ICE. An image stitched using the panorama feature of a camera/phone or produced using any similar program such as Hugin will do just as well.
Step1. Change the proportions of the image so that it is the same dimensions in height and width. Click ‘image’ then ‘image size’. When the resize image image box appears untick the ‘constrain proportions’ box. Change the horizontal dimensions to the same as the vertical ones. If the image is very large it might be an idea to resize both dimensions to the size you wish the completed image to be. the image will now look like this:
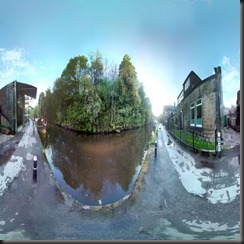
Step2. The image needs to be rotated so the the ‘sky’ is at the bottom of the image. Go to ‘image’ then ‘rotate canvas’ and select 180°.
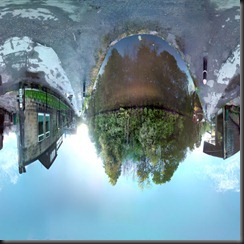
Step 3. Now to create the planet effect select ‘filter’ then ‘distort’ and choose ‘polar coordinates’ make sure ‘rectangular to polar’ is ticked. That it! your image will now look like a small planet.

what works: A full 360° x 180° panorama works best but any wide panorama image can be used as long as there is a large unbroken area of sky. An image where the horizon is the same height at both ends will produce ‘rounder’ planets. Images that are not fully 180° vertically may produce a squashed effect in the centre of the image but this might look just as good, as this is easy to do it’s best to experiment with any suitable photos you may have.

The image above is a full panoramic image stitched using Microsoft ICE. An image stitched using the panorama feature of a camera/phone or produced using any similar program such as Hugin will do just as well.
Step1. Change the proportions of the image so that it is the same dimensions in height and width. Click ‘image’ then ‘image size’. When the resize image image box appears untick the ‘constrain proportions’ box. Change the horizontal dimensions to the same as the vertical ones. If the image is very large it might be an idea to resize both dimensions to the size you wish the completed image to be. the image will now look like this:

Step2. The image needs to be rotated so the the ‘sky’ is at the bottom of the image. Go to ‘image’ then ‘rotate canvas’ and select 180°.

Step 3. Now to create the planet effect select ‘filter’ then ‘distort’ and choose ‘polar coordinates’ make sure ‘rectangular to polar’ is ticked. That it! your image will now look like a small planet.

Subscribe to:
Posts (Atom)
LinkWithin
