Full 360 panorama showing the town hall, library and galleries. Taken from the corner of the Headrow and Calverley Street.
Sunday, August 21, 2011
Friday, August 19, 2011
New facebook page for panoramic photos
Some of the best ones from the past couple of years or so are now on here:
http://www.facebook.com/pages/Photosynth-and-Photography-Phil-Openshaw/222427561135082
for people who like facebook...
http://www.facebook.com/pages/Photosynth-and-Photography-Phil-Openshaw/222427561135082
for people who like facebook...
Thursday, August 11, 2011
Making panoramic images with Hugin Part 1
Introduction Hugin is a photo stitching application (actually a tool chain of applications) that can be used to join photos into composite image, correct image and perspective distortion and create full and partial panoramas.
Unlike many comparable programs Hugin is fully GPL and can be used in conjunction with several other stitching applications and other helper software .
Stitching images together
The simplest way to begin using this program is to click on the Assistant tab (the first on on the left) this will allow you to run the program automated for simple jobs.
1. Click load images, this will bring up a standard dialogue box allowing you to select the images you want. It may be better to try this with a simple panorama using a few photographs at first.
2. Hugin will analyse the photographs for data on the focal length and visible angle of the shots. If you are loading images taken with a mobile phone this may not be encoded in the image. Hugin will prompt you to enter this data if it not available. For now just enter a figure 40 mm if you don't know
3. Click the 'Align'button. The program will begin to analyse the photographs for common points on the images you are stitching. This can be quite a long process as Hugin will first try to match the images in sequential pairs and then find common points with groups of images.
4. Preview the image. A separate window will now open showing a rough preview of the stitched images. This window will also allow you to select differing projections of the completed project. For now leave it as it is.
5. Click generate panorama. This will now bring up another box showing the progress of the stitching process. When this has finished your Completed image will be in the same directory as the source photographs.
Saturday, August 6, 2011
How to create tiny planets from panoramic photos and Photoshop
These images can look great and are very easy to produce from existing panoramas.
what works: A full 360° x 180° panorama works best but any wide panorama image can be used as long as there is a large unbroken area of sky. An image where the horizon is the same height at both ends will produce ‘rounder’ planets. Images that are not fully 180° vertically may produce a squashed effect in the centre of the image but this might look just as good, as this is easy to do it’s best to experiment with any suitable photos you may have.
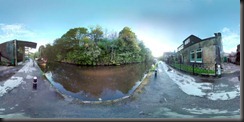
The image above is a full panoramic image stitched using Microsoft ICE. An image stitched using the panorama feature of a camera/phone or produced using any similar program such as Hugin will do just as well.
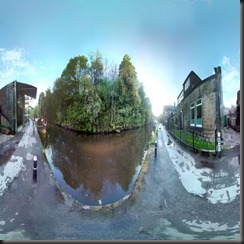
Step1. Change the proportions of the image so that it is the same dimensions in height and width. Click ‘image’ then ‘image size’. When the resize image image box appears untick the ‘constrain proportions’ box. Change the horizontal dimensions to the same as the vertical ones. If the image is very large it might be an idea to resize both dimensions to the size you wish the completed image to be. the image will now look like this:
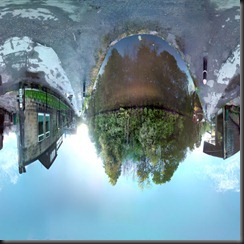
Step2. The image needs to be rotated so the the ‘sky’ is at the bottom of the image. Go to ‘image’ then ‘rotate canvas’ and select 180°.
Step 3. Now to create the planet effect select ‘filter’ then ‘distort’ and choose ‘polar coordinates’ make sure ‘rectangular to polar’ is ticked. That it! your image will now look like a small planet.

what works: A full 360° x 180° panorama works best but any wide panorama image can be used as long as there is a large unbroken area of sky. An image where the horizon is the same height at both ends will produce ‘rounder’ planets. Images that are not fully 180° vertically may produce a squashed effect in the centre of the image but this might look just as good, as this is easy to do it’s best to experiment with any suitable photos you may have.

The image above is a full panoramic image stitched using Microsoft ICE. An image stitched using the panorama feature of a camera/phone or produced using any similar program such as Hugin will do just as well.
Step1. Change the proportions of the image so that it is the same dimensions in height and width. Click ‘image’ then ‘image size’. When the resize image image box appears untick the ‘constrain proportions’ box. Change the horizontal dimensions to the same as the vertical ones. If the image is very large it might be an idea to resize both dimensions to the size you wish the completed image to be. the image will now look like this:

Step2. The image needs to be rotated so the the ‘sky’ is at the bottom of the image. Go to ‘image’ then ‘rotate canvas’ and select 180°.

Step 3. Now to create the planet effect select ‘filter’ then ‘distort’ and choose ‘polar coordinates’ make sure ‘rectangular to polar’ is ticked. That it! your image will now look like a small planet.

Thursday, August 4, 2011
Subscribe to:
Comments (Atom)


